
Finally, it's here, it's here! I can share my projects with the Hello Spring collection from Little Yellow Bicycle!!! I got a little carried away and created a ton of projects...2 layouts, 2 altered and then 2 cards. What can I say, you know I love LYB. Thank you to Liz, Peg, Sharon and everyone over at Little Yellow Bicycle for having me back on a cycling team. I hope I get to do it again!
Please head over to the LYB blog when you get done here, as I am not going to show all my projects here today. I also have step by step instructions for a layout that I have done over there!
(Note-I am not listing out supplies, since they will be over on the LYB blog for each project. All LYB product is from the Hello Spring collection. I will be listing misc. items that I used that are not LYB products here)
This is one of my layouts that I made. I love the die cut paper, but truly, sometimes I have a hard time working with them, because there is not a straight edge....weird right? I knew I wanted to use the decorative edged cardstock pieces in some way on the page, but I just wasn't sure how...I made a pocket, by layering a couple of them together and then placing my photo on top. Then, I could just tuck journaling into the pocket.

Misc. Supplies: Twine-The Twinery; Adhesives: Scotch, Fabri-Tac and Scrapbook Adhesives
I was happy that when I trimmed the picture out, I had left it like a wide polaroid. This left me a perfect spot to place that banner and then accent it with The Twinery twine.
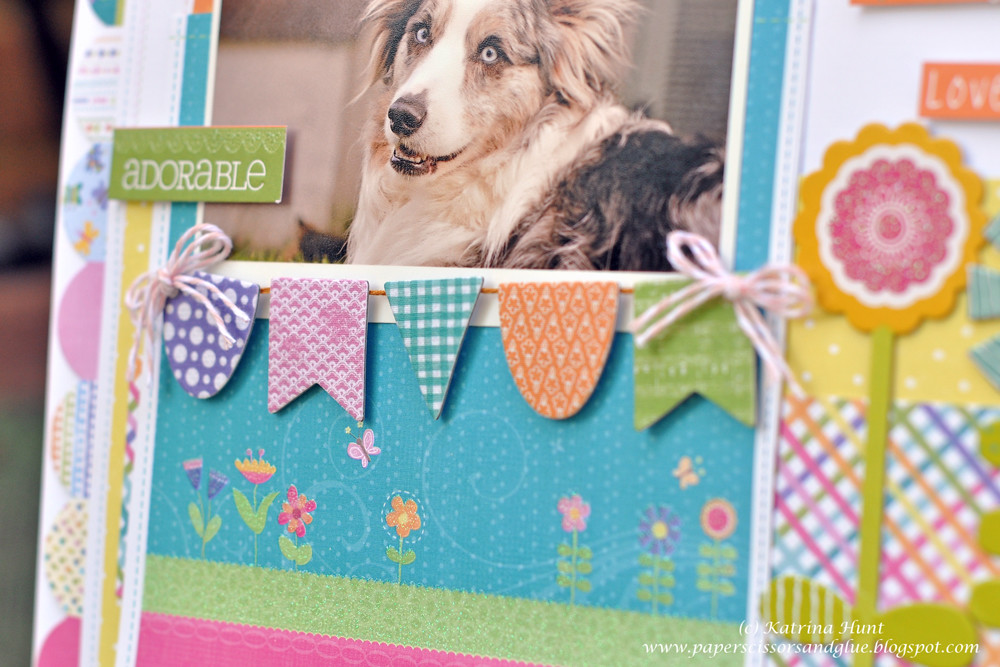
I love the pink bird! I had to use her somewhere! The tail feathers are wire!

Just a shot of the chipboard, dimensional and phrase sticker I used.

I knew when I saw the 6x6 mini pad that I wanted to figure out how to use the hello strip on one of the papers. So, I made my card size a 4 x 6 and built from there. I made the banner strips, lined them how I wanted them and attached them to a strip of cardstock that is hidden. Then I attached them to the card. This kept them straight and in the right order..and made it easier on me!
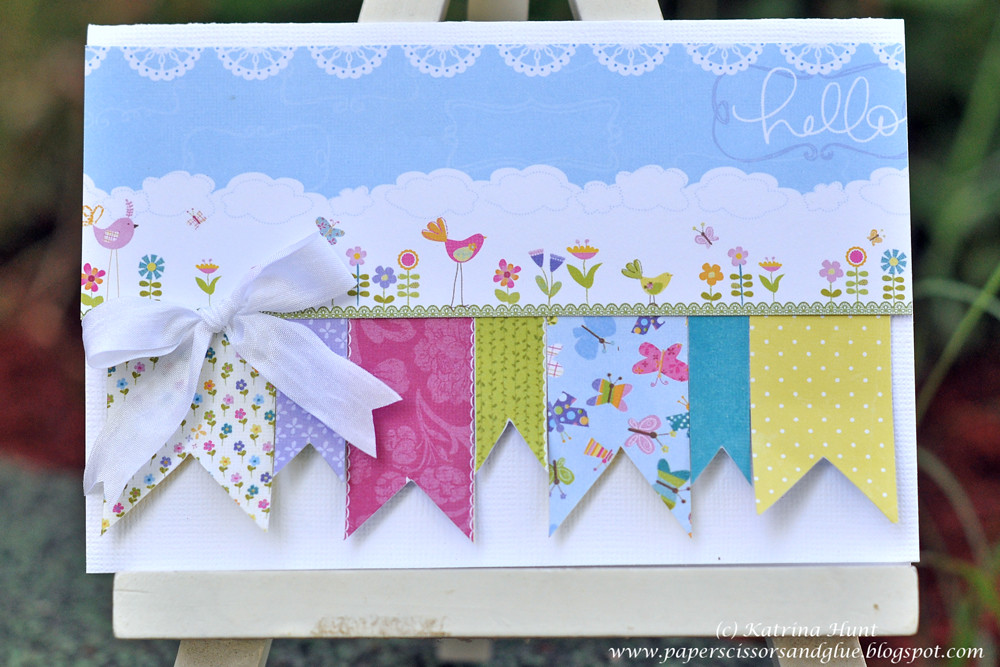
Misc Supplies: Cardstock-Core-dinations; Ribbon-May Arts;
Adhesives-Scotch and Fabri-tac
Honestly, I am not too sure about this one! It's a fun little door hanger that you could put on your front door or it would make a great quick gift. I love the "blinged" out tree though and that was the part that took the longest. I think it may be the ribbon, but I didn't really want to use white. And I didn't seem to have any other that would match...GASP.
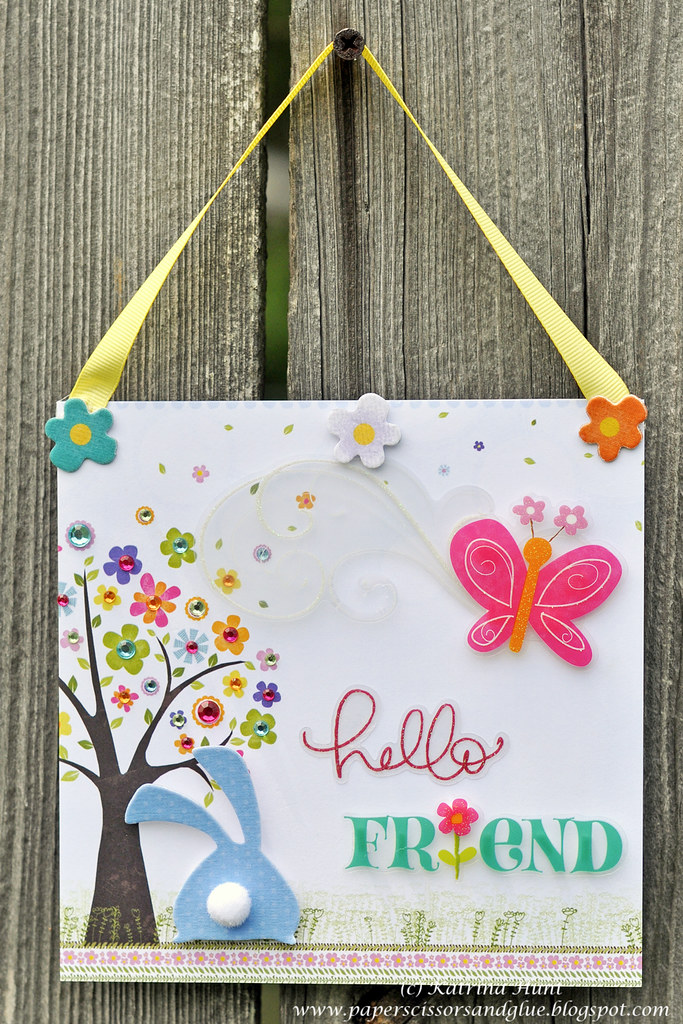
Misc Supplies: Ribbon-Michaels; Adhesive-Scotch, Scrapbook Adhesives and Fabri-Tac
I hid my pop dots under the colored letters on the word friend.
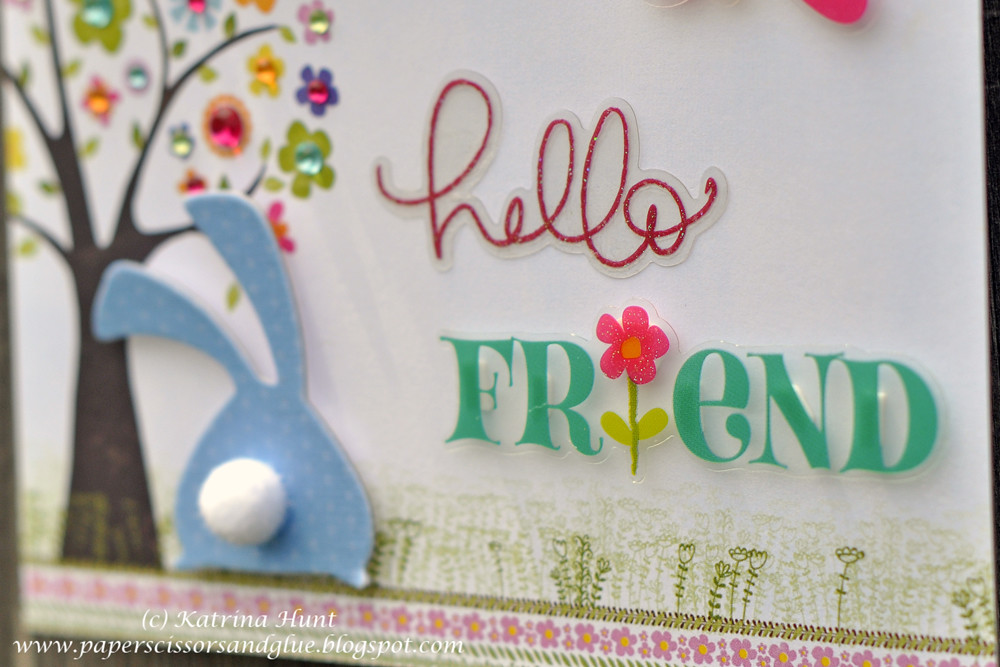
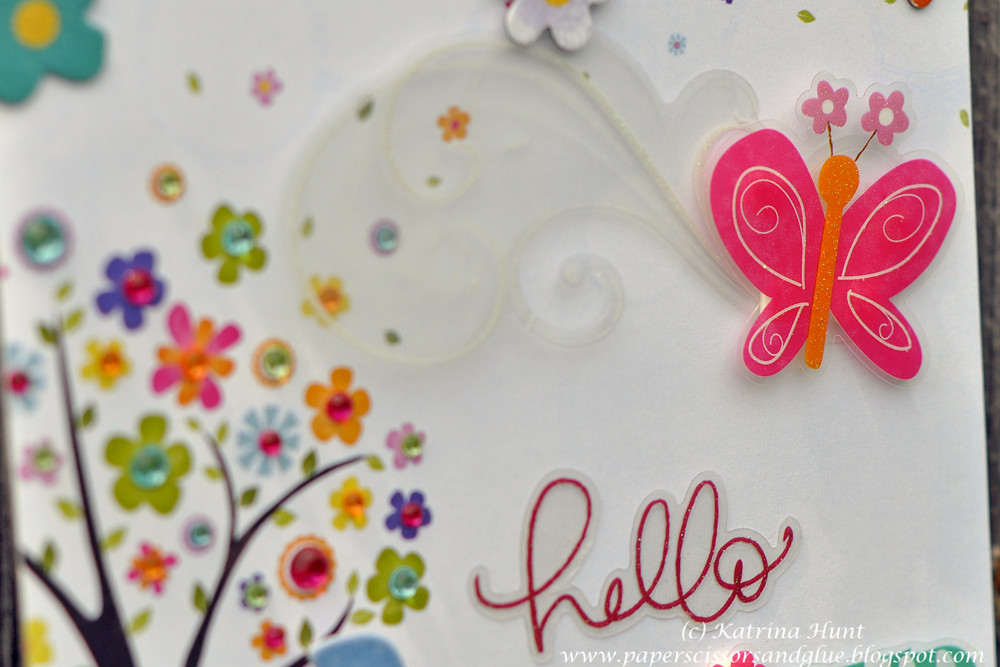
I used the clear pieces mostly on this...and I love those swirls and it was a perfect trail for the butterfly!
Ok, so now, RUN RUN RUN...or actually CLICK over to the LYB blog to see my other three projects. While you are there you could say hi and it would make me happy! And don't forget to grab the instructions for the layout over there in case you want to recreate it!


Super cute layout, fabulous card, and WONDERFUL wall hanging! CUTENESS all around!
ReplyDeleteYour pages are always so bright and full of happiness! Brought a smile to my day! Thanks!
ReplyDeleteAwesome job, Katrina!! I love how you used the banner on your layout and card! The door hanger is super cute...and I love that "blinged" out tree too!! :)
ReplyDeleteYou did a terrific job with these projects, Katrina. LOVE them! So cute and creative.
ReplyDeleteGreat job. I loooove that card!!! So cute!
ReplyDelete